Showing posts with label kids. Show all posts

Monday, May 12, 2014

Sparkle Princess Playdough

Strawberry-Scented


Sparkle Princess Playdough from thecoersfamily.com
We’re big fans of playdough around here. It’s a terrific tool for creative play that allows your child to explore textures, visual reasoning, spacial concepts – it’s just an all-around brain builder. And we’re especially fond of scented playdough. We created a batch of sparkly princess playdough for our Abby’s third birthday party. This recipe is so simple, you can whip up a batch in just a few minutes.

Abby requested a pink princess party for her birthday. We happily obliged with pink decorations and sparkly nonsense all over the house. She’s the ultimate girly-girl, with no prompting on my part. I am more of a mud-pie kind of gal. But she’s into all things princess right now and that’s cool with me. The majority of her friends are little boys, so they were invited to be warriors or superheroes if they were costume-inclined. We made a blue batch for anyone who wasn’t totally into pink.
sparkly princess playdough
These two batches of playdough made perfect, inexpensive, party favors.
playdough princess party favors
We’ve used this easy playdough recipe in the past and it just works great every time. It’s very easy to make a few simple changes to customize your playdough with added scents, food colors, and other fun things… like glitter.

Sparkle Princess Playdough

Ingredients:
  • 2 cups flour
  • 1 cup salt
  • 2 tablespoons cream of tarter
  • 2 tablespoons – or more – ultra fine glitter
  • 2 tablespoons vegetable oil
  • 1 1/2 cup boiling water
  • 1 tablespoon strawberry extract
  • about 10 drops red food coloring
  • plastic bags for storing
ingredients for sparkle princess playdough
Heat water to a very low boil (just starting to see bubbles). I popped mine into the microwave for about three minutes.
hot water for play dough
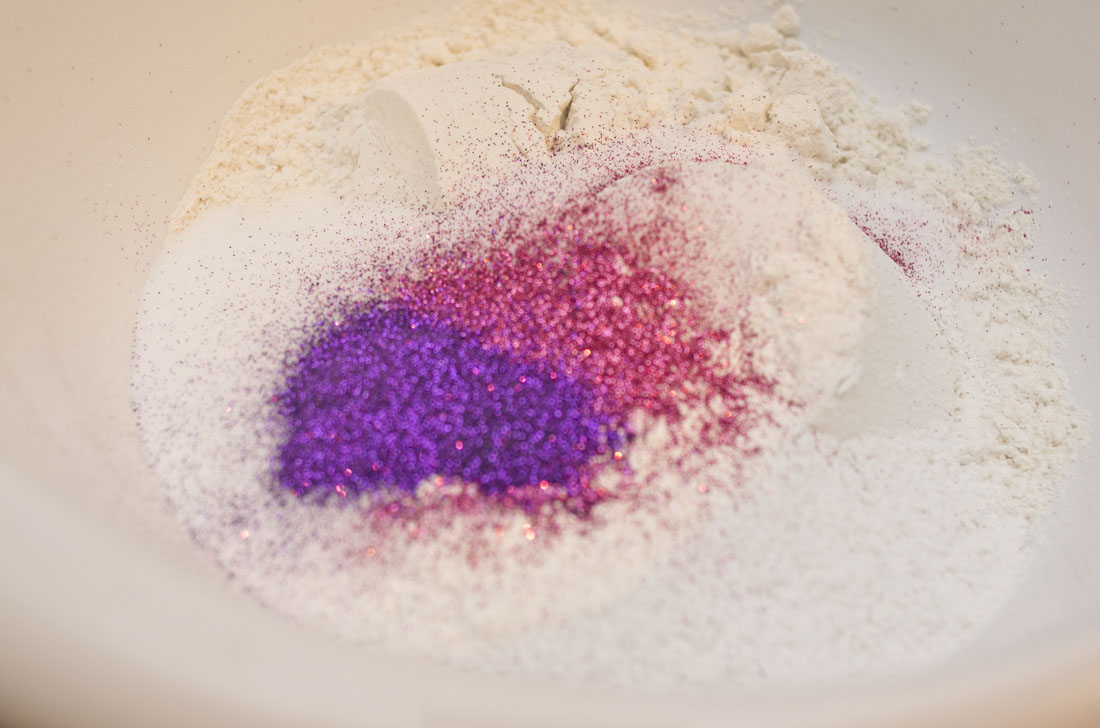
While the water is heating, combine flour, salt, cream of tarter, and glitter in a large bowl.
making sparkle princess playdough
Stir to mix well. Add vegetable oil. No need to mix just yet.
making sparkle princess playdough
Next add hot water and food coloring drops.
making sparkle princess playdough
Stir, stir, stir until a dough ball begins to form.
making sparkle princess playdough
You may need to use your hands to form the dough, once it’s cooled enough to handle.
making sparkle princess playdough
And it’s just a matter of smooshing and mooshing until you have a nice big ball of playdough.
homemade strawberry scented sparkle princess playdough
It’s best to store this playdough in a ziplock plastic baggie after play time to keep it from drying out. Your little princess (or prince) will enjoy this fun sparkly, strawberry-scented playdough.

Posted

Sunday, April 01, 2012

Easter Bunny Treats


I love this fun & simple dessert for kids anytime of the year!! It's such a cute Taste of Home Recipe.
Easter Bunny Treats Recipe Easter Bunny Treats Recipe
Ingredients:
  • 2/3 cup vanilla frosting
  • 30 large marshmallows
  • Pink gel or paste food coloring
  • Red and pink heart-shaped decorating sprinkles
  • 60 miniature marshmallows
DirectionsEaster Bunny Treats Recipe 1.  Frost the tops of 12 large marshmallows; stack a large marshmallow on top of each. Quarter the remaining large marshmallows; set aside for ears. Tint 1/4 cup frosting pink. Cut a small hole in the corner of a pastry or plastic bag; place pink frosting in bag.

2.  Pipe a ribbon between the stacked marshmallows for bow tie. With white frosting, attach red hearts for eyes and a pink heart for nose. Pipe pink whiskers and smile.

3.  For ears, pipe the center of quartered marshmallows pink; attach to head with white frosting. With the remaining white frosting, attach the miniature marshmallows for legs and tail. Let stand until dry. Yield: 1 dozen.
15
Originally published as Easter Bunny Treats in Quick Cooking March/April 2003, p48

Monday, March 26, 2012

Kid Crafts

Look what I found when searching the web for 'Spring Crafts'...  Such a cute craft for those little hands! I can't wait to try this with all my grandbabies!!~


Paper plate crafts
Enchanted Learning Software's
Duck Paper Plate Craft
More Kinder Crafts This easy-to-make duck is a cute craft that is made from a single paper plate and construction paper.

More animal crafts
Supplies needed:
  • Paper plate
  • Scissors
  • Glue
  • Stapler
  • A pencil
  • Yellow and orange construction paper or oak tag
  • Crayons, paint or markers
  • Googly eyes (optional)
Trace your hands on yellow construction paper, then cut the hands out. If you don't have yellow construction paper, use stiff white paper, then paint it yellow (or use markers).
Fold a paper plate in half. Paint it yellow and let it dry
Staple the hands near the fold on one end - these will be the tail feathers.
Using yellow construction paper or oaktag, cut out a circle (about 3 inches across or a little bigger) -- this will be the duck's head. Using orange construction paper or oaktag, cut out an elongated oval with one end cut off -- this will be the duck's bill. Fold the end of the beak over, making a small tab (this is where you will put the glue).
Glue the bill onto the circle (put the glue on the small tab that will be folded under the bill). Draw eyes above the bill (or glue on small googly eyes). Staple the head to the paper plate (near the fold line, opposite the tail feathers).
Using orange construction paper or oak-tag, cut out the duck's feet - they should be connected by a short strip of paper. To draw each foot, start with an oval, then draw a zigzag on one end. Fold the paper where the feet meet the strip of paper.
Staple each foot to the bottom of one side of the paper plate, right inside the fold line of the foot. You now have a cute duckie that will stand up.
For a duck theme page, click here.

The Perfect ANYTIME Snack Blend

I enjoy making this yummy snack during Autumn. Makes a pretty table/counter display of Fall colors. The perfect treat blend for my little gr...