So, you say you have no time for a vegetable garden. Or, you are convinced that your thumb is definitely not green. Give these five tasty vegetables a try. You'll be surprised at how much fresh produce you can get for the amount of work you'll need to put in.
1. Beans
 Forever Garden Vegetable Seeds - Emergency Food
If you are going to grow beans, the best advice I can give you is to be sure you actually like to eat beans. Beans (specifically pole beans) are prolific, providing you with an almost constant harvest for several weeks during the summer. For a more manageable amount of produce, consider growing bush beans. In addition to not requiring the trellising that pole beans require, bush beans tend to produce one or two harvests during the season, so you don't have to worry about harvesting continuously to keep the plants productive. Beans require at least six hours of sun per day and regular watering, especially when they are blooming and fruiting.
2. Lettuce
 Organic Tomato & Vegetable Planting Mix
Whether you grow it in a traditional garden bed, a window box, or a flower pot,
lettuce is an easy and rewarding vegetable to grow. The main issue with lettuce is that it abhors hot weather, and will bolt in no time once the temperatures start to soar. Look for heat-tolerant varieties, such as 'Black-Seeded Simpson,' to prolong your harvest. Alternately, plant them in an area that gets a bit of afternoon shade. Keep your lettuce well watered, and grow cut-and-come again or loose-leaf varieties, which will provide plenty of lettuce for salads throughout the growing season.
3. Leafy Greens
 Frontier Natural Products
Many of the
leafy greens (kale, collards,
spinach, mustard greens, chard) are even easier to grow than lettuce, and are full of essential vitamins and minerals. While spinach is infamous for bolting as soon as the weather warms, crops such as
swiss chard and kale will keep producing happily in even the hottest weather. Like lettuce, leafy greens can either be grown in a traditional garden bed or in a container, making them a very convenient crop. In fact, a colorful glazed pot of 'Bright Lights' swiss chard is as ornamental as it is practical. Greens require regular moisture, soil with plenty of organic matter, and at least four hours of sun per day to thrive.
4. Summer Squash
 I Buy Local Fruits & Vegetables
There's a reason that the cliche of a gardener leaving bushels of zucchini on the doorsteps of unsuspecting neighbors is so prevalent. If you give a zucchini plant full sun, good soil, and plenty of water, the fruits will seem to grow before your eyes. Given their prolific nature, you really only need two or three plants to feed a family of four throughout the summer. Yellow squash tends to be a bit less prolific than zucchini, but you'll still be growing a bounty of squash either way. For a nice change, try switching the traditional zucchini for something like 'Eight Ball' zucchini, which are small and round. They are too large to grow in containers, and take up a fair amount of space in the garden, but they are worth it.
5. Tomatoes
 Great Vegetarian Cooking Under Pressure
Yes,
tomatoes are easy to grow. I'll never understand why some people think tomatoes are a tricky crop. Have you ever thrown a tomato into your compost pile? If you have, you'd know that the next season, you end up with tens to hundreds of little tomato seedlings. All tomatoes need are warm temperatures, eight or more hours of sunlight per day, and even moisture. Give them a soil that is rich in organic matter,
fertilize them monthly with a good, balanced organic fertilizer, and let them go. You don't even have to stake or cage them if you don't want to. They'll grow just fine sprawled out on the ground. For a truly worry-free tomato growing experience, choose hybrid varieties, which are usually more disease-resistant than heirlooms.


 Can you tell what they’re made from? They were easy to do–even something the kiddos can help with! And, I love the pop of color we have outside now.
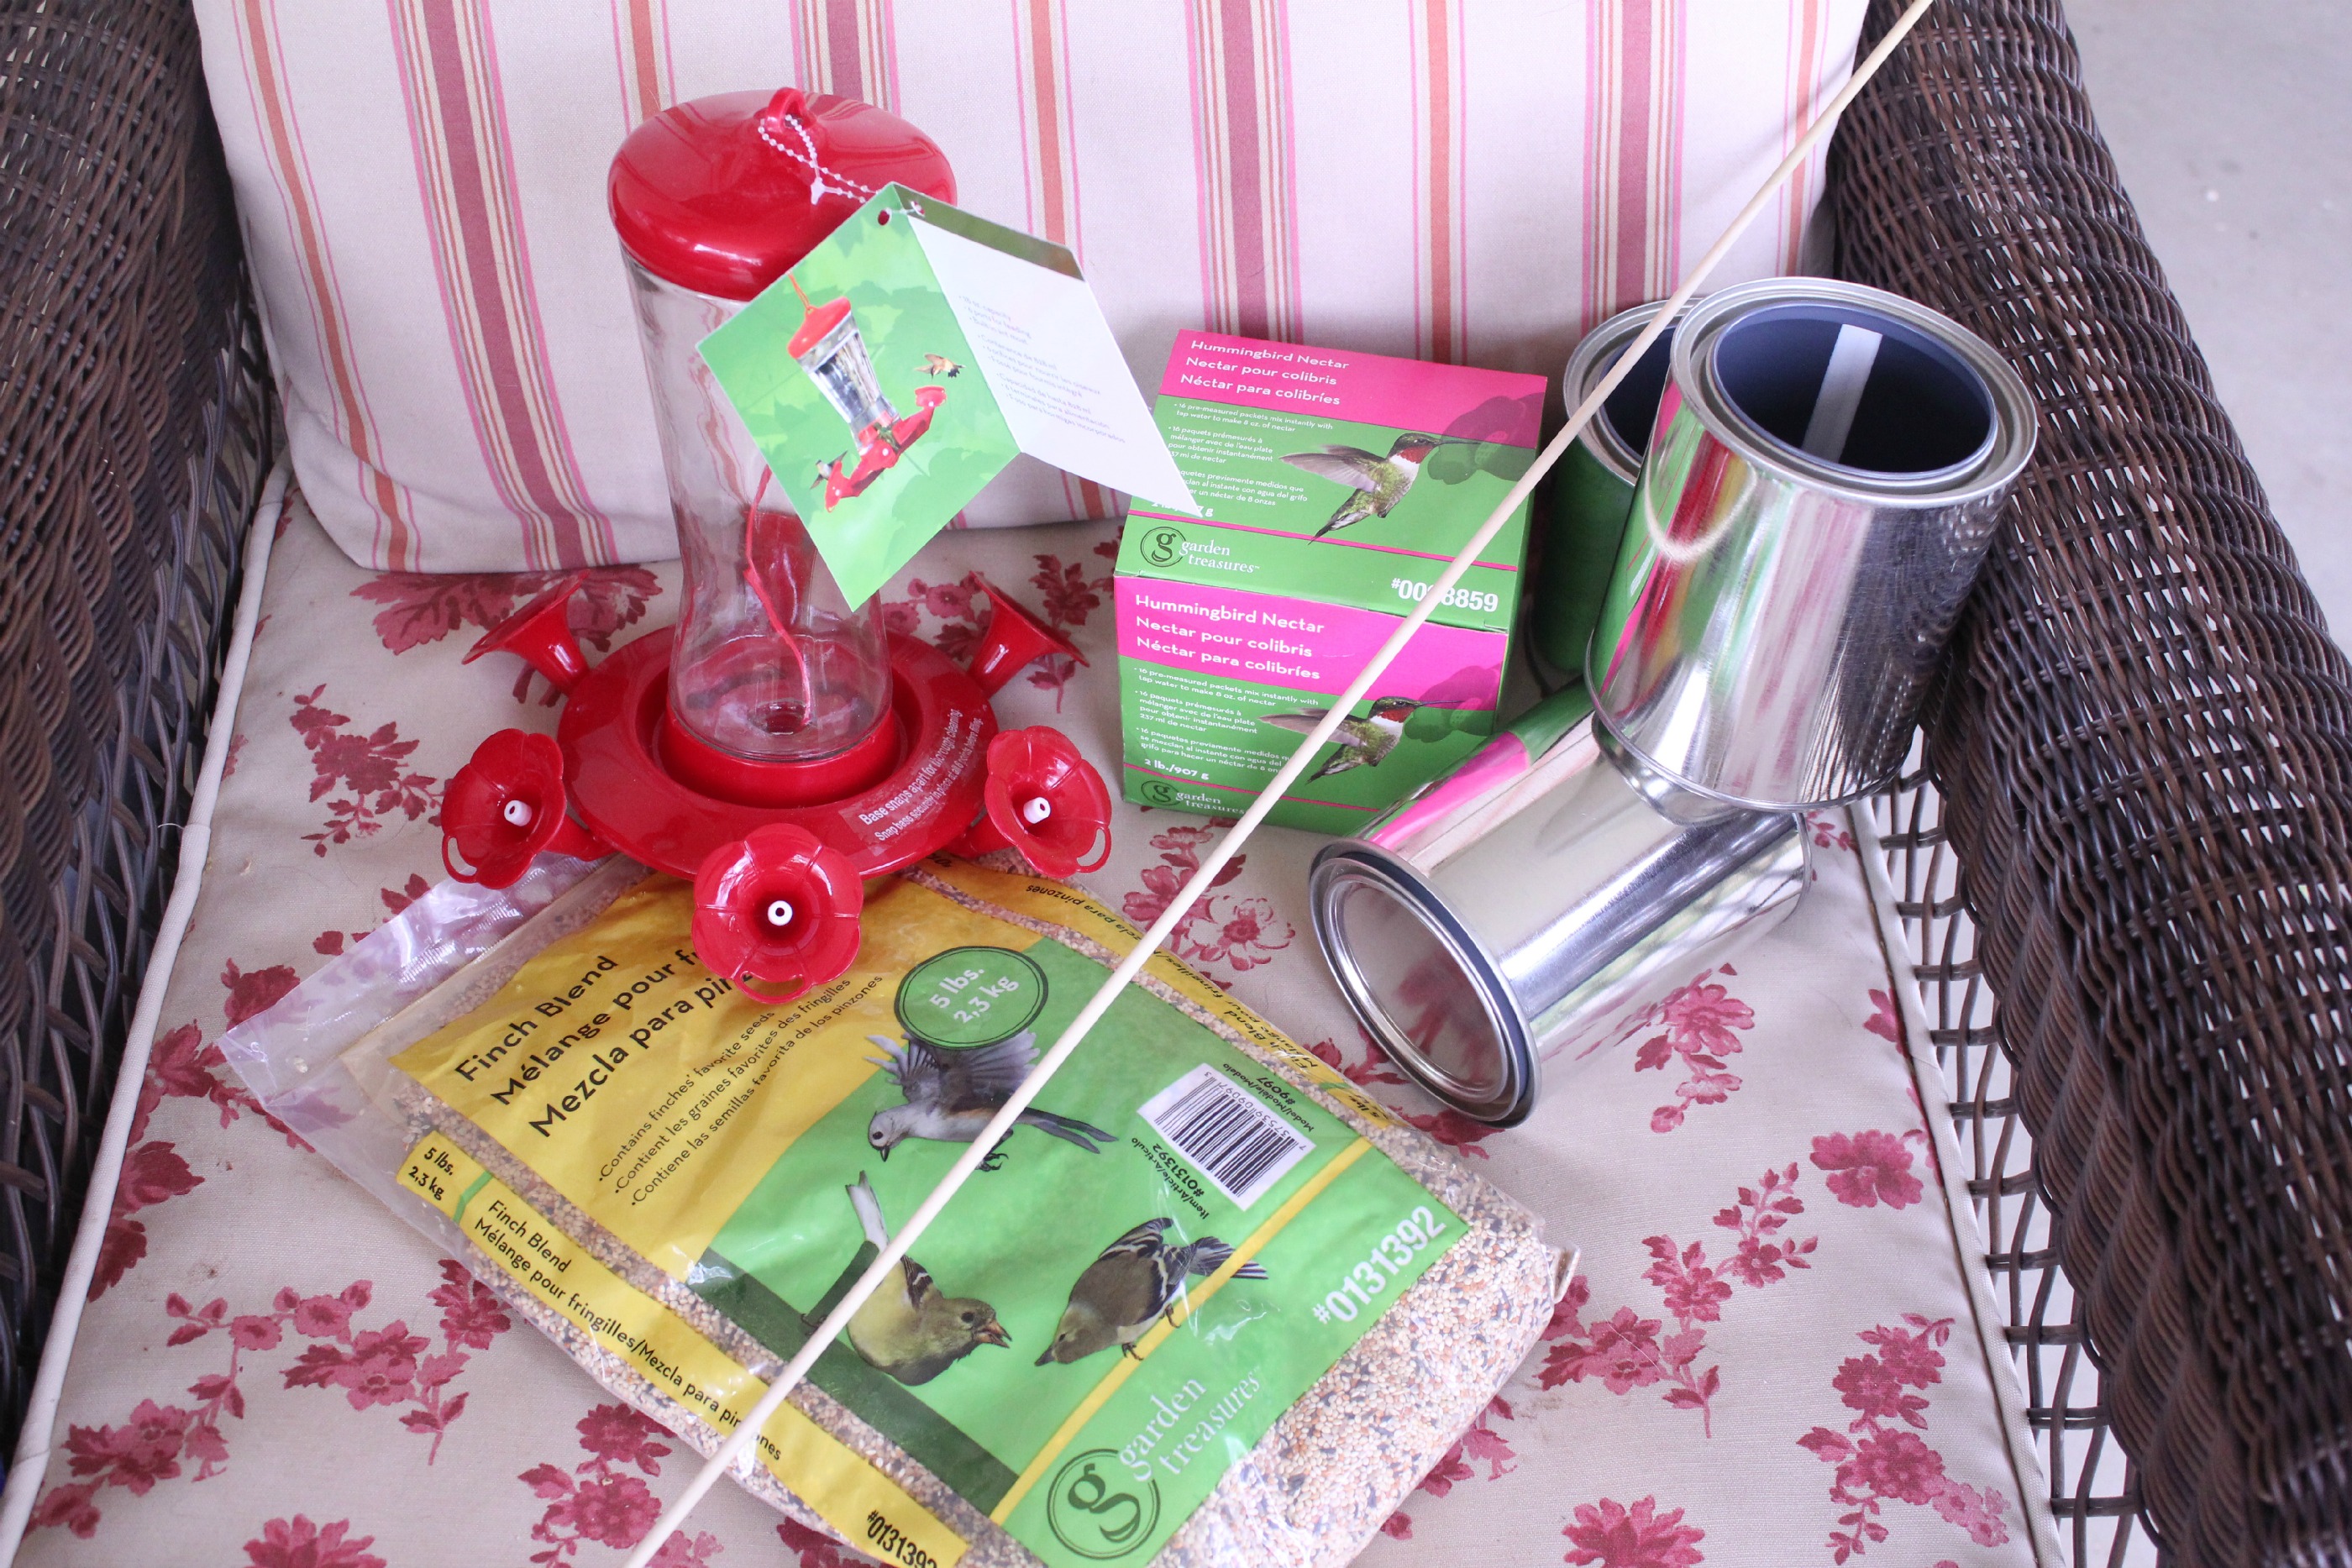 - 3 small paint cans, a 3/16″ wooden dowel, finch food, a Hummingbird feeder & Hummingbird food! Now, of course, the hummingbird stuff wasn’t part of our DIY project. But, since we were thinking of our little feathered friends, we had to get something for our beautiful desert hummingbirds–like this guy:
 Hopefully they’ll come around even more often now that we have a new feeder filled with that super sugary red liquid!
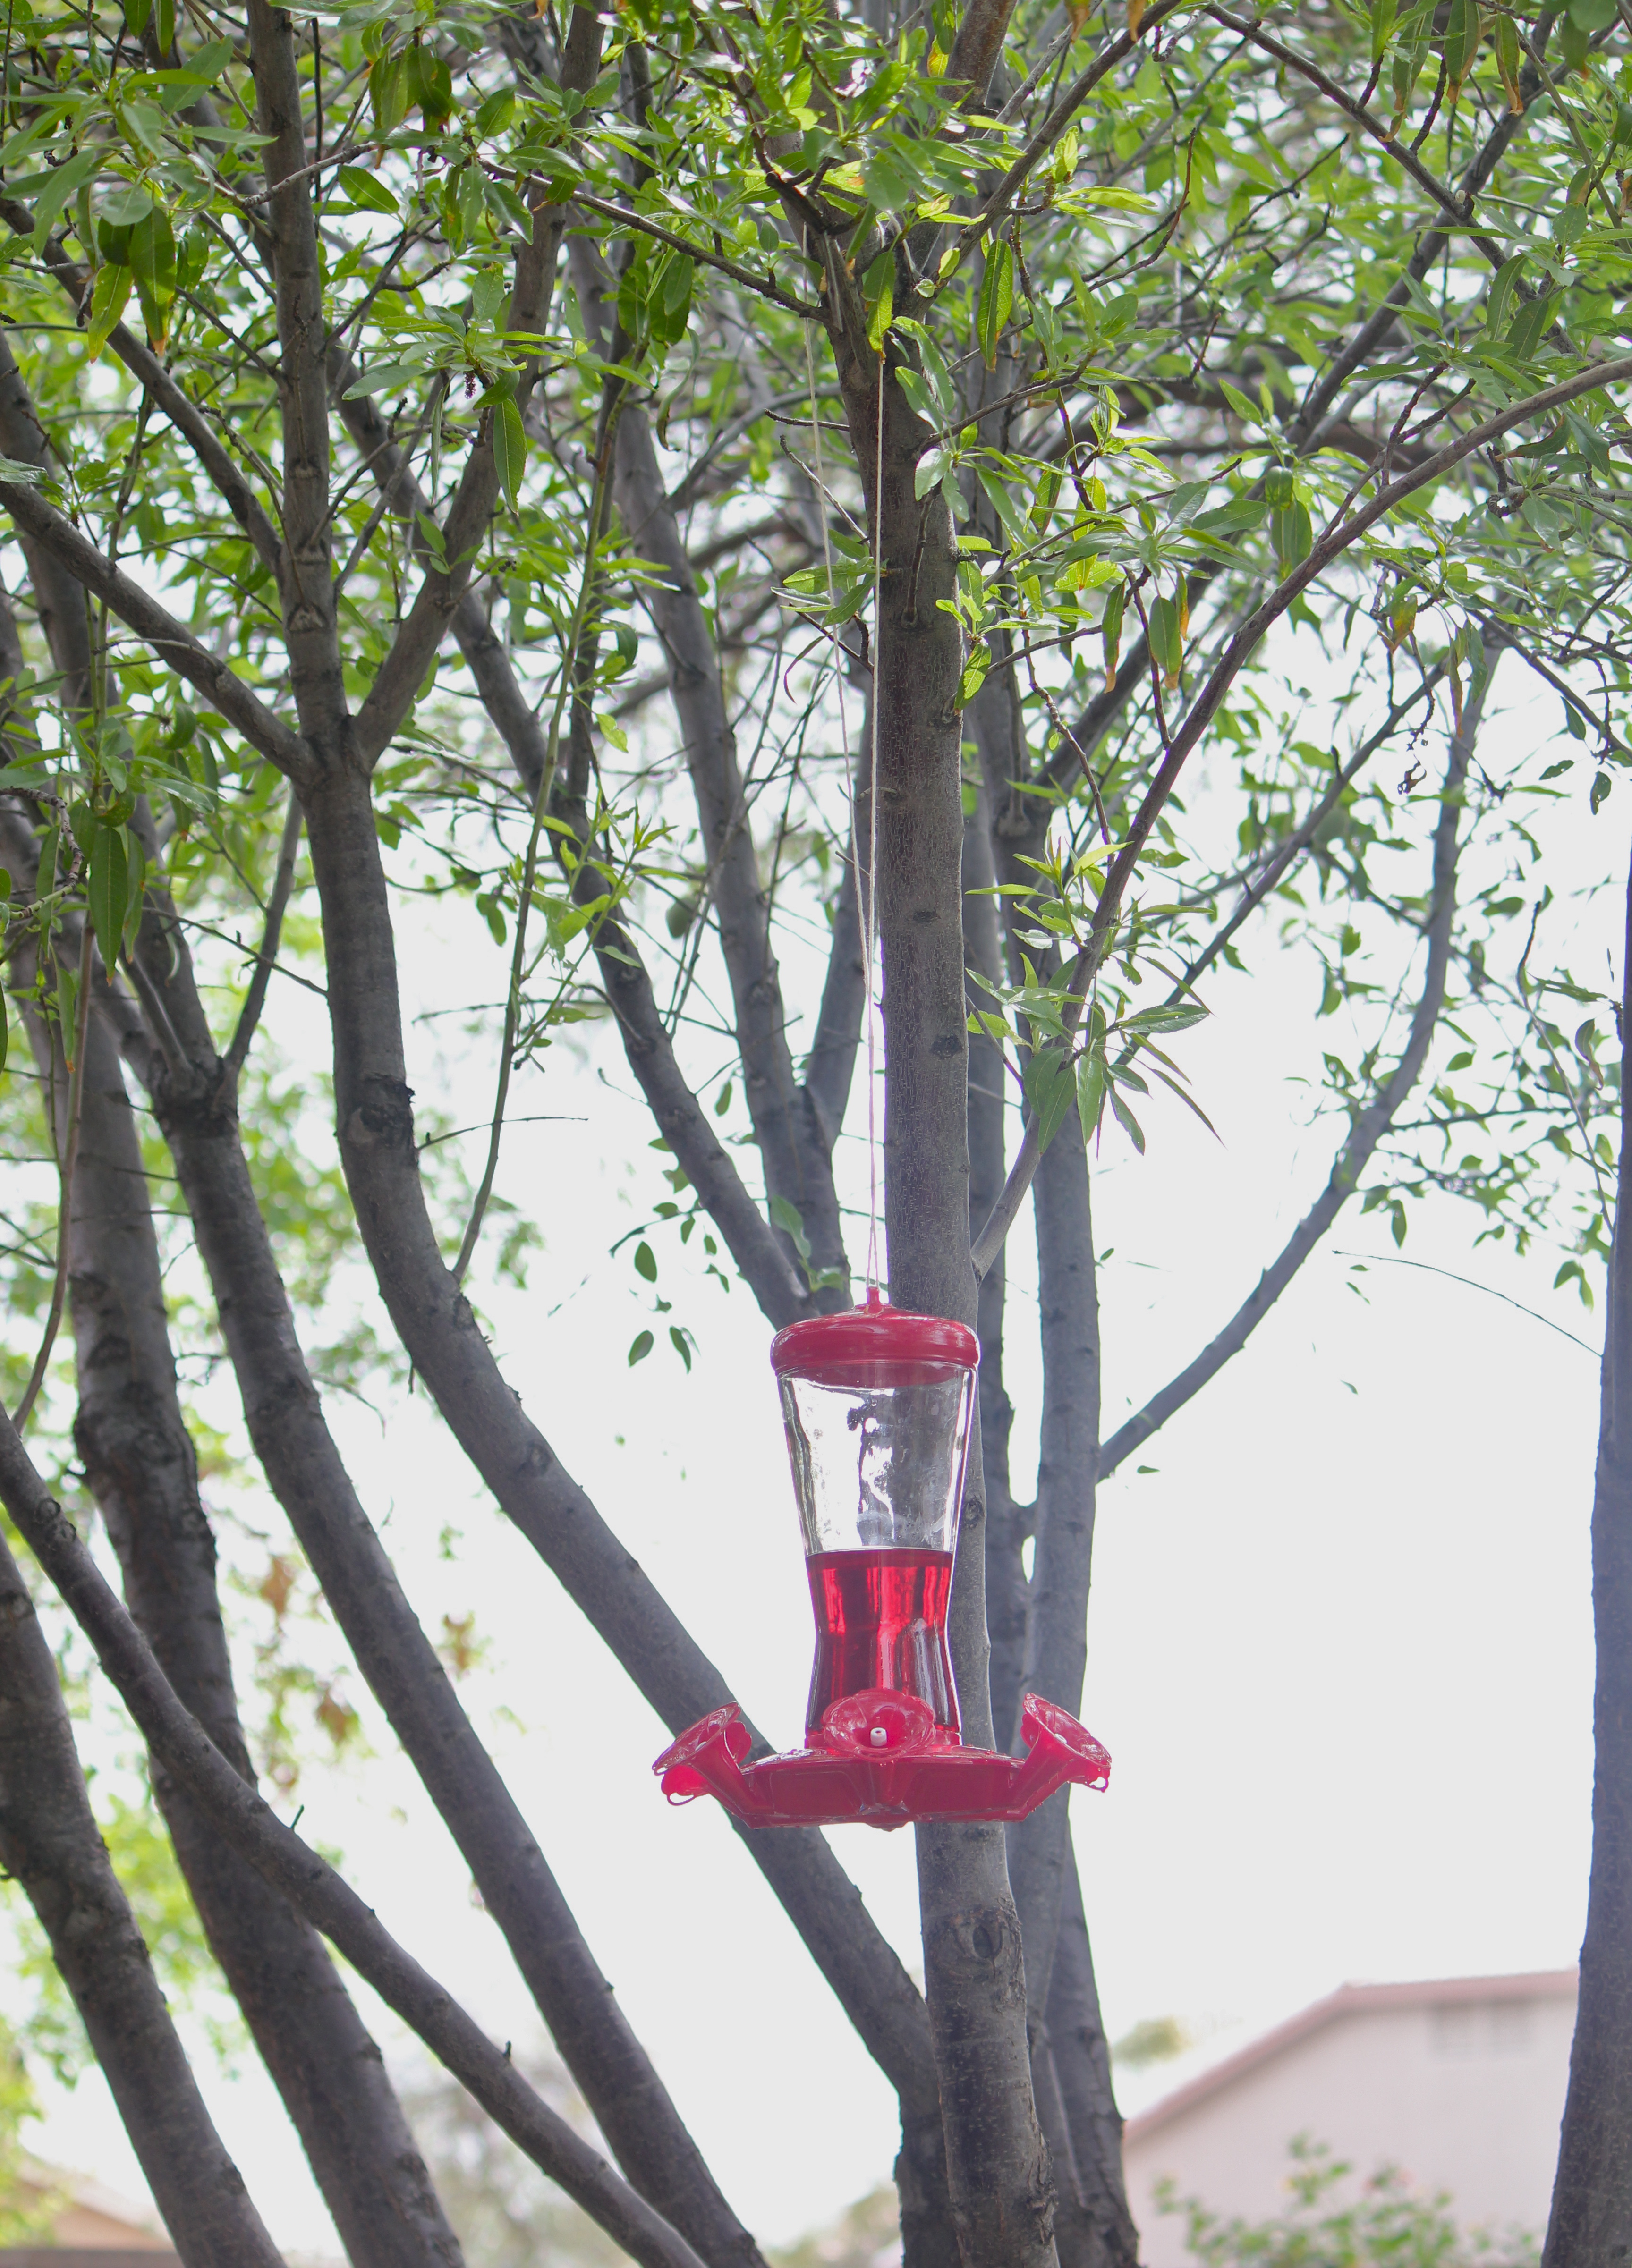
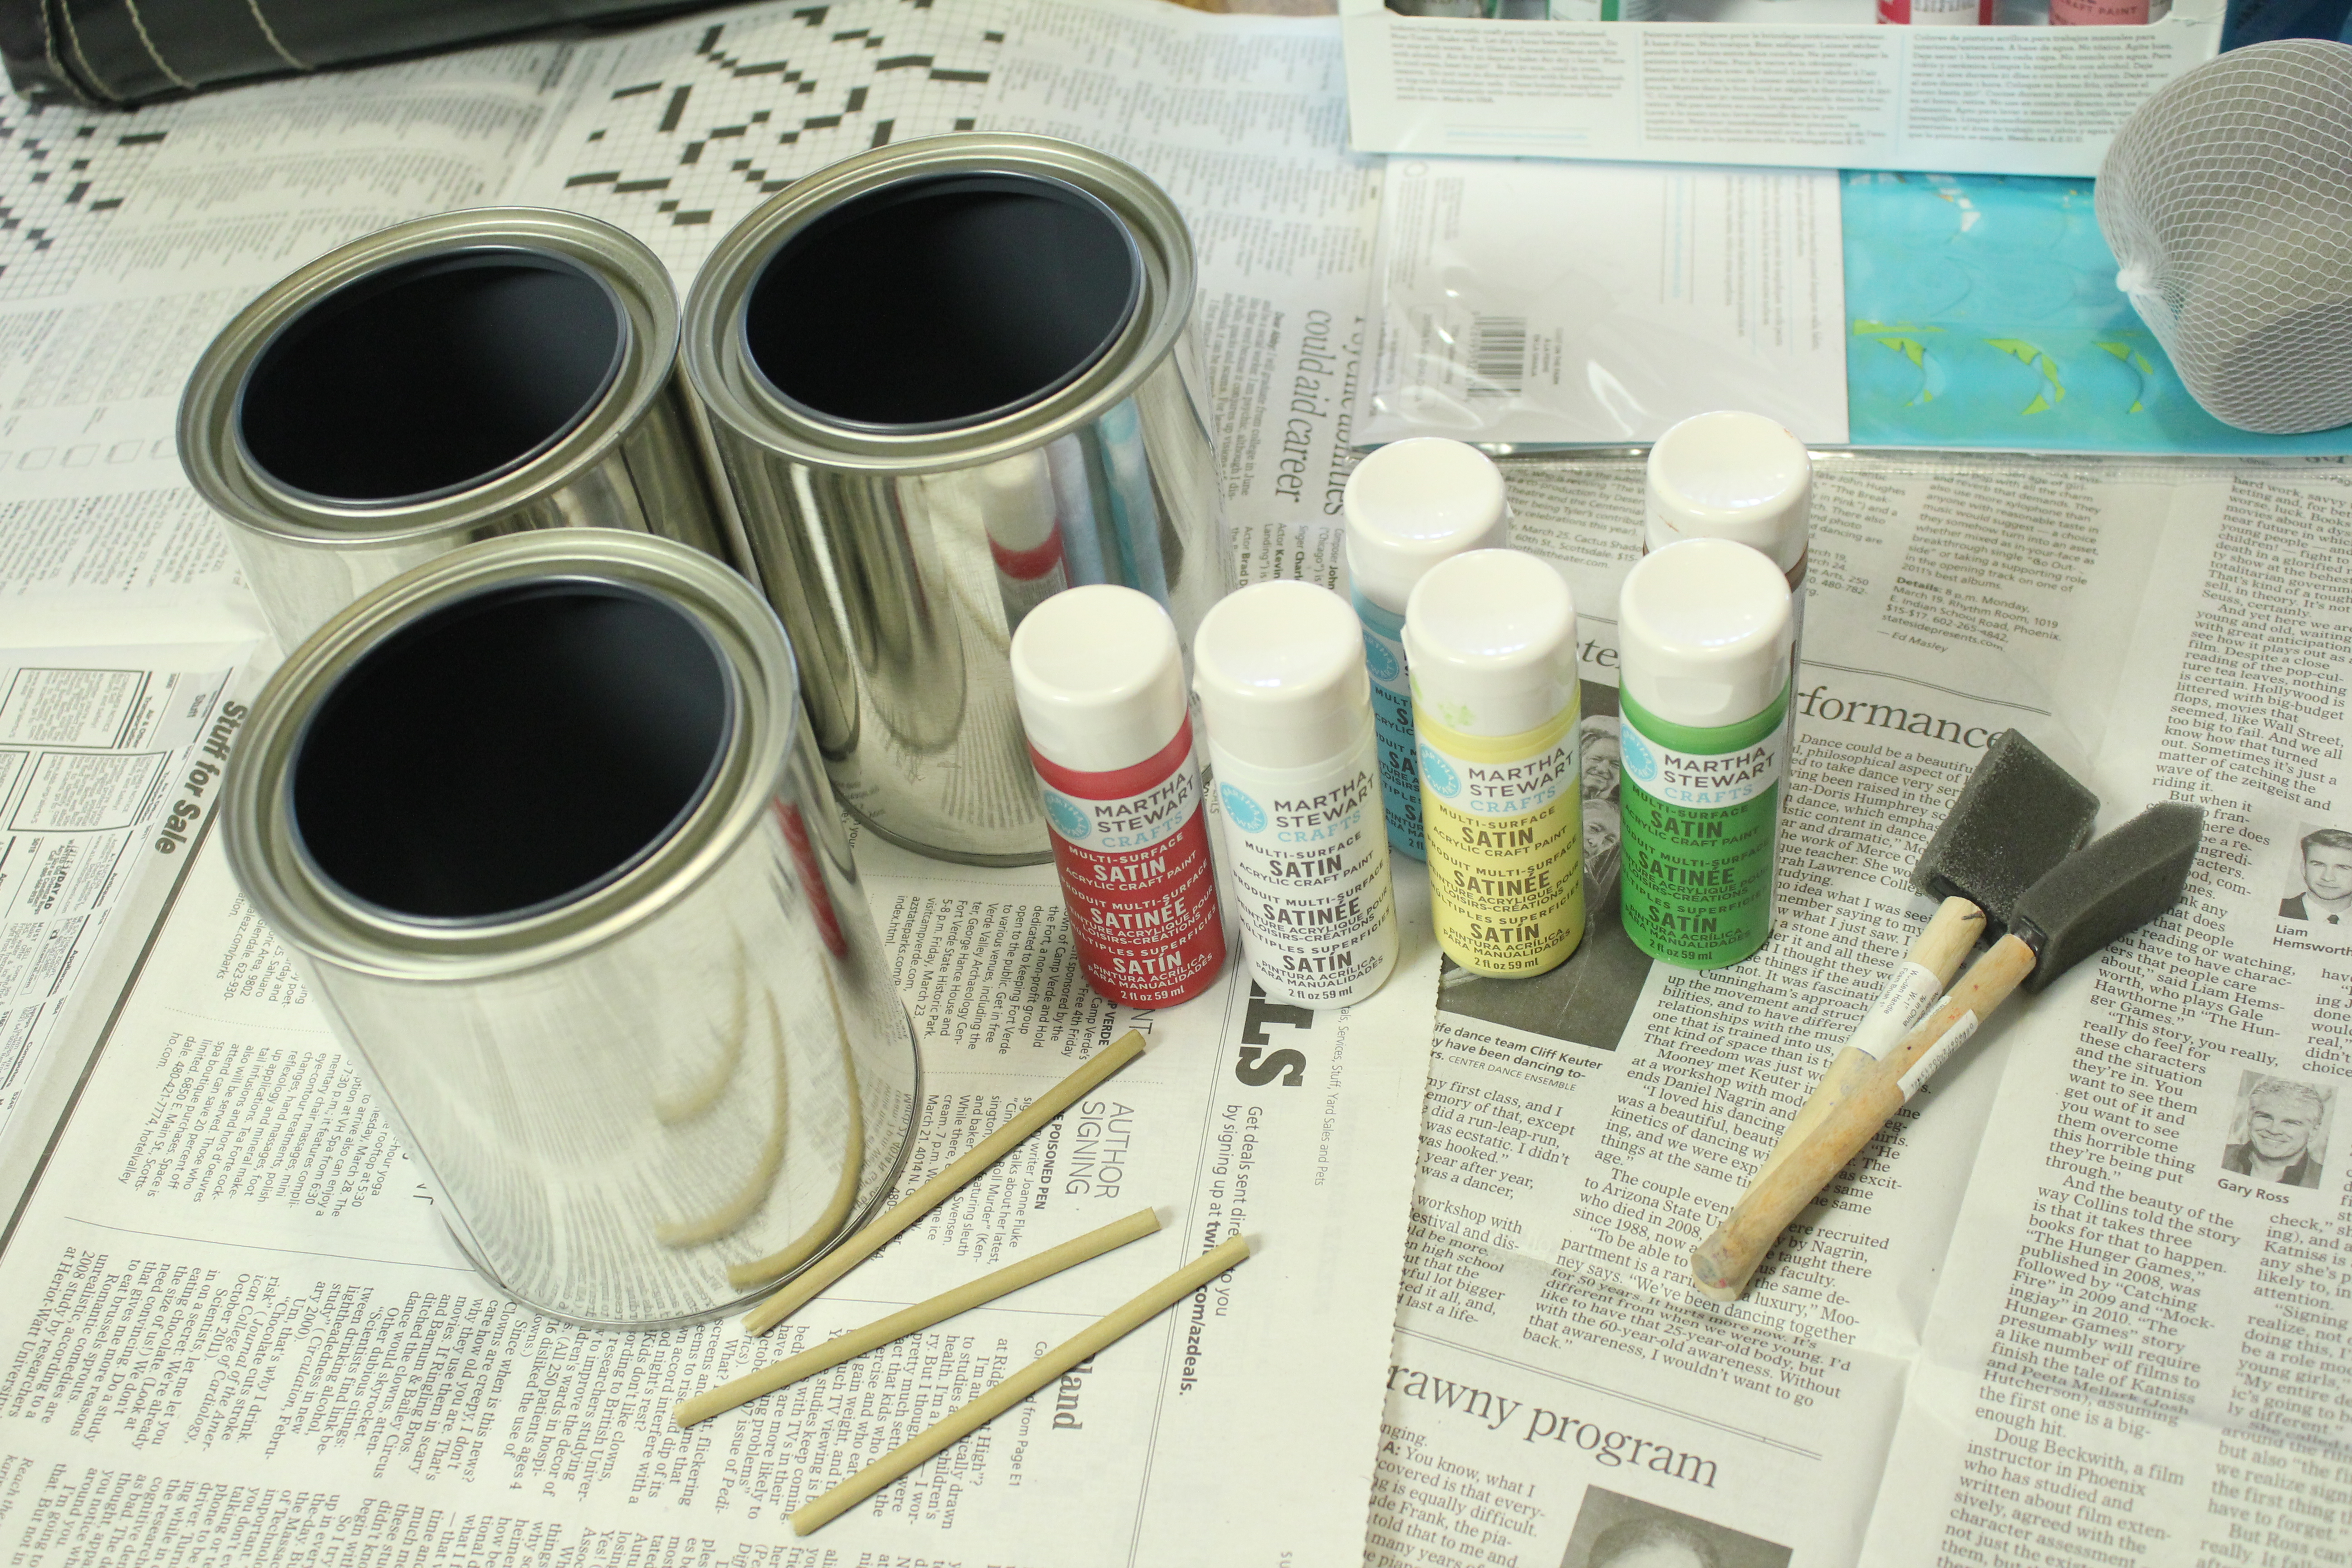
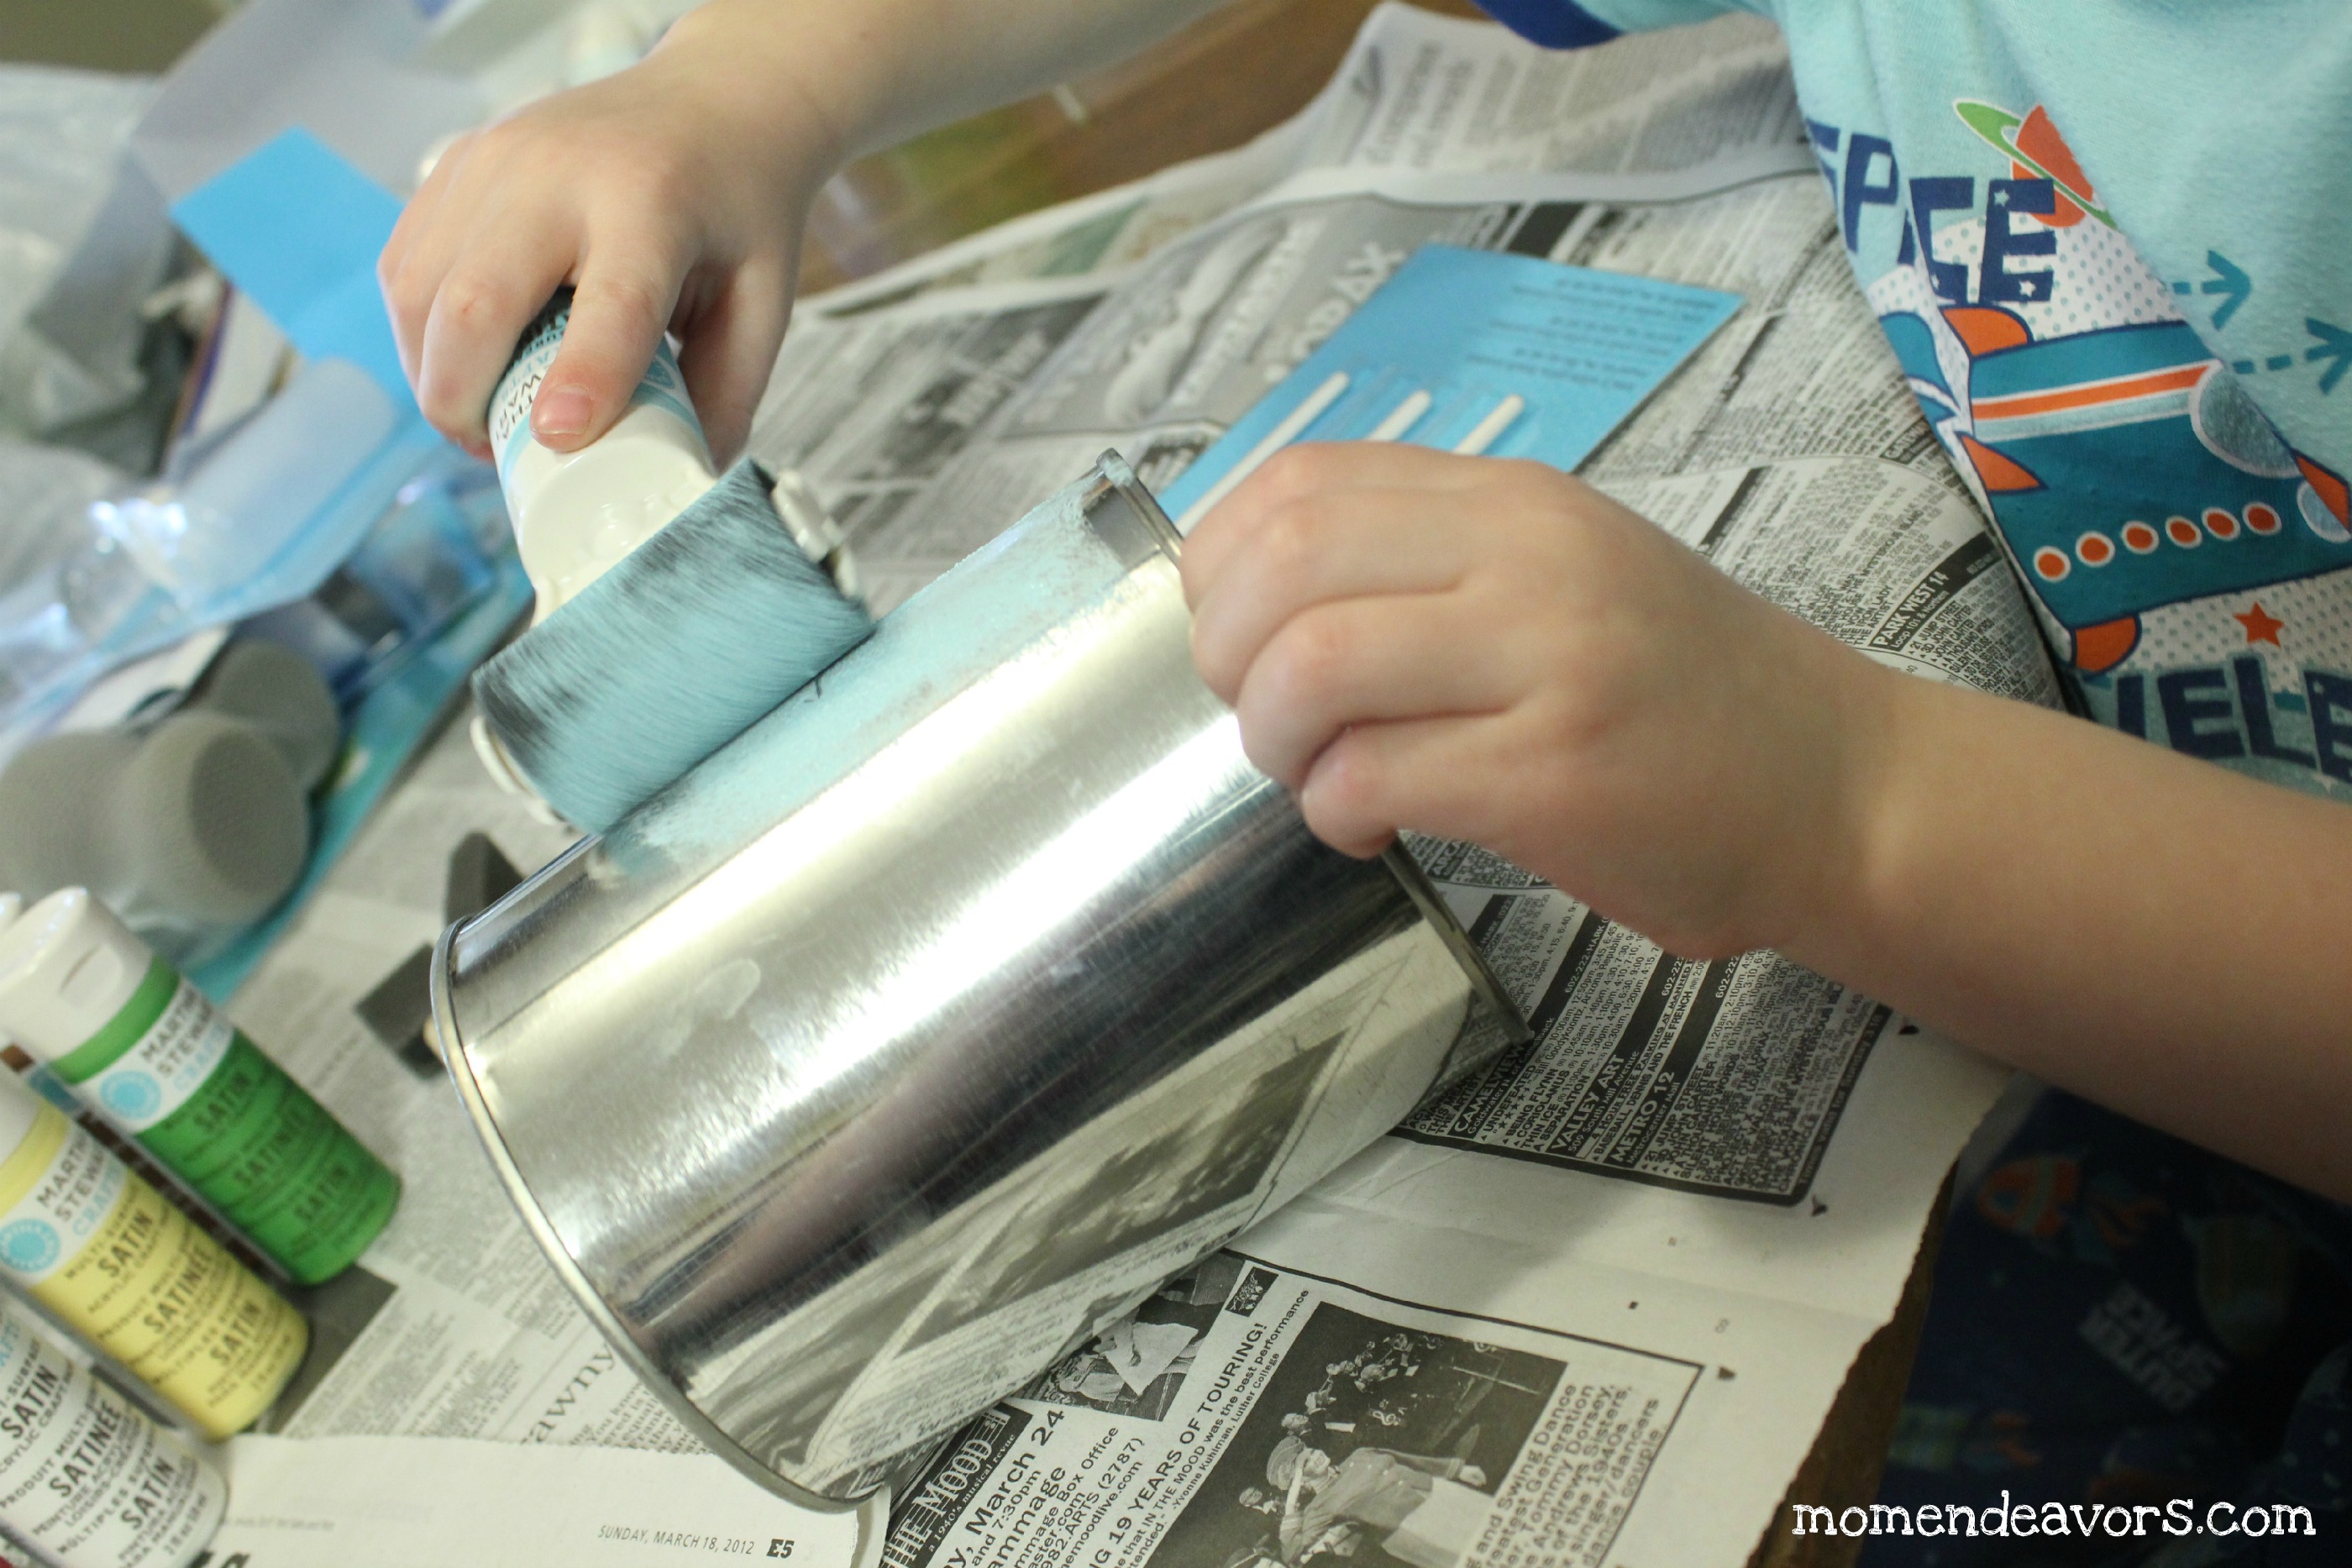
 Once those had a good while to dry, put a little bead of hot glue on the inside grove of the top of each paint can (where the lid would snap into) and stick a dowel piece in. Then, you will need something to hang them.
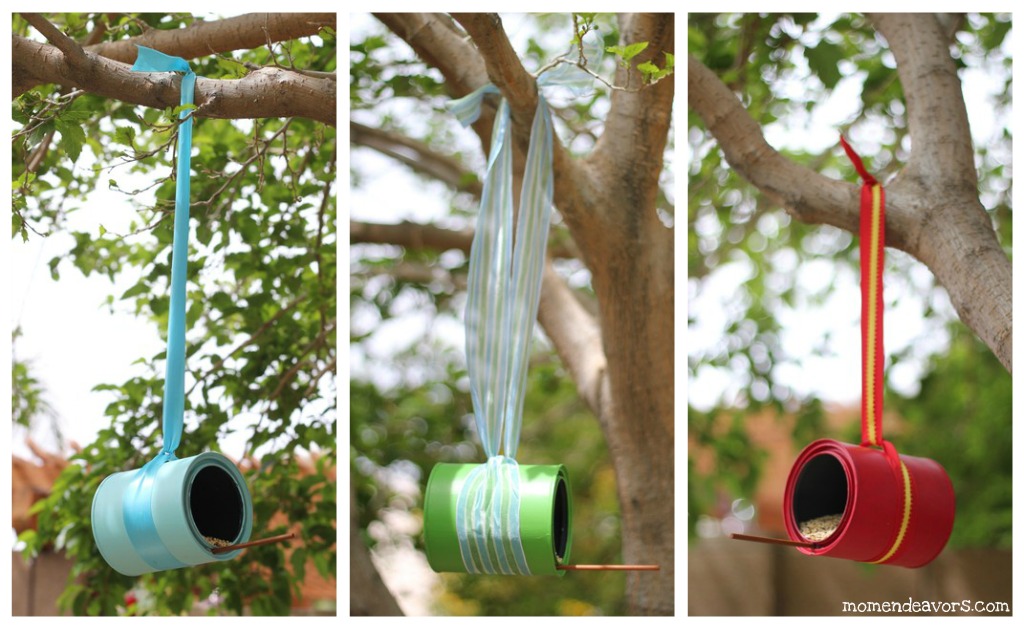 Quick & easy project and provides such a cute look out by the garden. And, here’s the best part…our fine feathered friends have already taken notice! Here’s what we saw when we came downstairs this morning:
 Build it and they will come!”
 "
"


