Tuesday, January 31, 2012

The Miracle Cleaner

Tub and Shower Magic

Tub and Shower Magic. Photo by gailanng
 
"This came from an Everyday Cheapskate e-mail and it is truly magic as the title states. I just tried it and it got the soap scum off my glass shower door with hardly any scrubbing. It was amazing as I have tried to clean that door with various products. It is so easy, too. Try it and you will be sold. Be careful because a little bit goes a long way. You need a 24 oz squirt bottle for this."

Ingredients

  • 12 ounces white vinegar
  • 12 ounces liquid, blue dawn detergent

Directions

  1. Heat vinegar in microwave until hot and pour into squirt bottle.
  2. Add the Dawn soap. Put the lid on and gently shake to incorporate.
  3. You now have a powerful cleaning product that will melt soap scum and tub and shower buildup, clean sinks, appliances and just about anything. Just spray it on, scrub, rinse and be amazed. For tough soap scum build-up, spray the mixture on and allow it to sit as long as overnight. Then, scrub and rinse.

Monday, January 30, 2012

It's Greeeeat!!

Repurpose Your Cereal Boxes

I love this idea....  sooo easy for the little crafters!! Crafting with recycled materials like cereal boxes...
Plumpuddingcerealboxes
Use cereal boxes for postcards, booklets and mailers


Belladia_drawerorganizers2

Cut them down for drawer organizers
Artprojectsforkidscerealboxbooks
Art Projects for Kids - mini books from cereal boxes


I especially love to give these types of materials to my grandkids for free art since the possibilities are really endless!

I like to use them as gift boxes especially for those hard to wrap presents. Whether just for fun or to make something truly beautiful — is a great way to avoid buying additional craft supplies! 
(that often end up in the trash at the end of the day anyway)

If you have other great uses for cereal boxes let everyone know here in the comments!

How to Make your own Laundry Soap

Recipe 2-

I blogged about making your own laundry soap already.  But here's one more recipe I will try out! I will be posted which works the best!
I did a lot of research online to find as much information as I could about making my own laundry soap. What I found was that pretty much all the recipes are essentially the same, some people use more or less of each ingredient, and that bath soap does not clean as well as laundry soap. I also learned that this is great for High Efficiency washers because it makes little to no suds (FYI the suds in store bought laundry detergent are for looks only and don't actually have anything to do with cleaning.)


I did the price breakdown which will save you a lot of mental math work. Basically, homemade laundry soap costs less than 1 cent per load. You can't get much better than that!


 Here's what you need:

Some kind of bucket to mix all your ingredients in. I used a 2 gallon paint bucket.
1/3 bar of Fels Naptha Laundry Soap (you can also use Zote, Octagon, or Ivory--amounts may vary)
1/2 cup Borax
1/2 cup Arm & Hammer Super Washing Soda (everything but the bucket can be found in the laundry aisle of grocery store.
Baking Soda and Washing Soda are different. See?


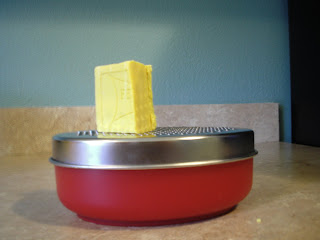
Step 1: Cut your bar of Fels Naptha Soap into thirds and finely grate one third of it
This looks like it would be good on spaghetti 

when making soap - save 2/3 for next batch
 
Step 2: Place grated soap in a pot w/6 cups of water & heat on low until the soap melts. Don't let the soap boil. After soap is melted add the washing soda and the borax and stir until it is dissolved. Continue stirring until the mixture thickens (almost as thick as honey) Remove from heat.


Step 3: Pour 4 cups of hot tap water into your bucket. Add the soap mixture and stir it up. At this point you could add a few drops of essential oil like lavender or tea tree oil if you wanted your soap to have a fragrance. Add nothing and your clothes will simply smell clean.


Give it another few minutes of stirring and then let it sit overnight.


Now add one gallon of hot tap water plus 6 more cups. I used my giant 8 cup Pyrex measuring cup but if I had had an old milk carton I would have just used that. As you can see my 2 gallon bucket barely fit it all. You might want to use a 5 gallon bucket to avoid unnecessary sloshing.


Step: 4 In the morning your soap might look runny or like gel or separated with big clumps of slime on top and water on the bottom. This is all normal depending on the weather, the type of soap you used. At this point you can be done and simply keep your laundry soap in the bucket and just scoop out 1/2 cup per load. Or you can give it another good stir and funnel it into your old well rinsed laundry soap bottle.

Step 5: I wanted to use a Beverage Dispenser with a spigot but my soap came out all clumpy and I knew there was no way it would flow through. So I busted out my immersion blender and smoothed all the clumps layer by layer.


If you have a Downy ball, you can put about 1/2 cup of Distilled White Vinegar in there and it makes a fantastic fabric softener. And no, your clothes do not come out smelling like vinegar. If you don't have a Downy ball just add your 1/2 cup of vinegar to the rinse cycle. I don't like babysitting my washing machine so I have a Downy ball.
 
I found this cute cup at a thrift store and it holds exactly 1/2 c

Making Fabic Softner & Dryer Sheets!

Scented Fabric Softener and Dryer Sheets
Making your own fabric softener and dryer sheets is made easy and cost effective by using ingredients and materials readily found in most households. If you like a light scent on your clean laundry, you can coordinate the scents of your laundry powder, fabric softener, and dryer sheets.
IMG_9167 

Fabric Softener
Equipment
  • Measuring cup
  • Measuring spoon
  • Permanent marker
Ingredients
  • 32 ounces Distilled White Vinegar*
  • 1-2 teaspoons Essential oil*
Making the Softener
Add your essential oil to the vinegar container and shake well to incorporate. Label your container to let others in your household know that it contains essential oils and is NOT for culinary purposes.
IMG_9169

Using the Softener
The vinegar mixture should be diluted with water before being used in your laundry. For regular sizes loads, combine 1/4 cup of vinegar mixture with 3/4 cups of water. For large loads, use 1/2 cup of vinegar mixture and 1/2 cup of water. Add the diluted mixture to the fabric softener dispenser at the beginning of the wash cycle. If you do not have a dispenser, add the softener at the beginning of the rinse cycle.
This will leave a faint essential oil scent but you will not smell vinegar on the rinsed and dried clothing. The vinegar helps soften your clothing, and aids in reduction of static in the dryer phase. This softener also works well with air dried or line dried clothing.
*Never use vinegar on Dry-Clean ONLY garments.
*Use recommended precautions when using essential oils.

Scented Dryer Sheets
IMG_9174
Equipment
  • Used 100% Cotton T-shirt
  • Ruler
  • Scissors
  • Small airtight container with lid
Ingredients
  • 3-5 drops Essential oil*
Making the Sheets
Measure and cut 4" x 4" squares from your cotton t-shirt. One shirt will make quite a few sheets, so you can have a stack ready to go, or give away the extras as gifts. Place 3 – 5 drops of your selected essential oil on each square. Do not use more than 5 drops per square, as too much essential oil can leave stains on your clothing or make you sick. To preserve the aroma of your dryer sheets, store them in an airtight container between uses.
*Use recommended precautions when working with essential oils.
IMG_9158
Using the Sheets
Place one sheet in the dryer along with wet garments and dry as usual. These dryer sheets can be used twice before they need to be refreshed. To do so, simply toss them into your washing machine to launder, than add fresh essential oil.

Homemade Weed Killer Recipes & Tips

Pulling weeds by hand is not always easy or practical, they’re pesky and determined to pop back up and spread in no time. If you’re looking for more natural ways to control them that don’t include harsh chemicals and are safer for children and pets (bonus: most are pretty frugal too), here is a list of diy recipes and solutions from my collection. I’ve also included a few tips at the bottom.

  • Vinegar: Kill weeds dead with a good shot of vinegar. For best results, don’t dilute with water and choose a time to spray when there’s no sign of rain. Household vinegar is around 5% acetic acid concentration which will do the trick for new growth. If you can find a stronger vinegar (like pickling which is about 9%), that will give better results for more mature (and stubborn) varieties.
  • Salt: This is effective but keep in mind that significant amounts will cause damage to surrounding soil as well. Salt should only be used in places where you want no plant growth (like driveways, sidewalk cracks, underneath decks and patio blocks, around the foundation of the house, etc.). To use, a ratio of 1 part salt to 2 parts water should do it. You can also drizzle straight salt over top.
  • Salt & Vinegar Recipe: (read note above first). Combine 1 1/4 cups of table salt with 1 gallon of household vinegar. Spray where needed.
  • Vinegar & Dish Detergent: Fill a spray bottle with pickling vinegar and add a squirt or two of liquid dish detergent. Spray during the hottest part of the day.
  • Liquid Dish Detergent: Make a soap solution of 1 part liquid dish detergent to 10 parts water. Soak the pesky growth with this mix.
  • Boiling Water: Plug in the kettle, bring it to a boil then pour the hot water over weeds (you’re basically cooking them to death).
  • Lemon Juice: Either use straight lemon juice or try 1/2 cup lemon juice mixed with 1 quart household vinegar. This works much the same way as straight vinegar, but lemon juice is more expensive. I would only use this if I had more lemon juice on hand than I knew what to do with.
  • Common Recipe: 1 quart household vinegar, 1/4 cup salt, 2 teaspoons liquid dish detergent (only use a detergent that contains no bleach). Mix together and spray.
  • Corn Gluten Meal (this is different than corn meal): This is an all natural product that deters weeds spreading by seed. Effective on crabgrass, dandelions, curly dock, knotweed, lambs quarters, pigweed, plantain and others. Can be used on lawns, flowerbeds, bulb beds and vegetable gardens. Make sure to use CGM that is labeled as “pre-emergent herbicide“, stuff from the feedstore doesn’t have enough protein to work. Keep in mind that using CGM affects seed growth for all types of plants, not just those you’re trying to get rid of.

Tips

  • Many natural remedies and products will not only work, but they may also kill surrounding grass, plants and flowers. When using a recipe, make sure to apply to the weed only (keep in mind that liquids will saturate and seep into the ground where roots from favored plants may be able to reach).
  • Use when there’s no sign of rain for at least a day or two, hot sunny weather will give you best results.
  • For gardens and flower beds, consider laying newspapers and mulch in and around your plants–the weeds will have a difficult time rooting and spreading.
  • Weed growth is greatly reduced when using the “No Dig” method of gardening. The idea is to make a foundation of compost/mulch then only use soil where you plant (make a hole in the mulch, stick a handful or two of dirt inside then plant the seedling).
Did you know: Many weeds are used in home remedies for all sorts of things and some are even edible and tasty! For example, dandelions can be used to make a delicious syrup, wine or jelly, while plantains can be crushed and used to reduce itching from mosquito bites or relieve pain from bee stings. Take some time to research the ones in your area and you may find some pretty clever ways to make them useful–you may just decide to let a few live and flourish in certain parts of your yard ;) .

Sunday, January 29, 2012

She considers…

    She considers a field and buys it; - Proverbs 31:16a

A good wife, a wife that pleases the Lord, she is a good steward with the money that God and her husband have entrusted her with.
.
It does not matter if your husband is a professional and makes a lot of money, or if you both work full time. Your husband holds all the pressure of the finances on his lap. They FEEL the pressure–even if their wives make MORE!

I say this to make certain that we all understand as wives that this frugal quality is something we should ALL be striving for…no matter what amount of money comes in or who brings it in.

When we are thrifty wives, we are not only helping our husbands, we are honoring God by being good stewards.

Practical ways we can help relieve our husband’s financial pressure (even if you both work!):

  1. Clip coupons and USE them. It may “seem” like a trivial amount, but in the long run you really are saving money.
  2. Make a weekly list of meals that your family will eat. Make the grocery list to go with it. When you get to the store, COMMIT to not buy ANYTHING that is not on the list. Oh, and NEVER go grocery shopping hungry!
  3. Only wash FULL loads of laundry. This will save on your water bill.
  4. If you can, hang some or all of your clothes outside to dry…or even your linens. This will save money on your electric bill.
  5. Keep the air on the same temperature during the day (78 degrees) and lower it in the evenings. The up and down all day adds to your electric bill. TRUST me on this one. I have the upsie downsie problem.
  6. When you need to buy a book, go to Amazon.com or ebay first. You can save big bucks going used. I have bought many used books through Amazon that are in great shape for a fraction of the cost new.
  7. Buy the Sunday paper and make a point to look through the sale papers for the things that you need. Try to stick to one or two stores, otherwise the money you spend on gas traveling around will diminish the money you are trying to save.
  8. Don’t eat out and stop buying Starbucks! A weakness...I LOVE a good cup of COFFEE! Unfortunately, our budget suffers when I give in. Make it a treat…without the kids if you have them. You can make it part of a monthly date night or something.
  9. Buy store brand whenever possible. There are a lot of good store brand products out there. I was a bit of a snob in the beginning, I’ll admit. LOL! However, I have discovered that most store brand items are pretty much the same as the “name brand.”
  10. Grow your own herb or veggie garden. If you have a yard, consider growing your own herbs and even fresh vegetables. Not only will you KNOW what is on them, they will be VERY fresh!
I really could go on all day. The message here is to find ways to save money, spend less money, and be a better steward with money.

I encourage you to sit down and make your own list of ways that you can be a thrifty wife!

God will bless you for honoring Him. Your husband is sure to be healthier with the major financial stress reduced as well!!

Make a Hanging Herb Drying Rack

Nothing makes a dish quite as yummy as herbs fresh from your own garden.

But if you've ever grown them, you know that when the growing season is over you will still have a lot left to harvest. Keep your food flavorful all year 'round by drying your excess herbs with a hanging herb dryer. 

Materials:

Old frames...the number depends on how many levels that you want.
Screw hooks -4 for a 1 level dryer, 12 for a 2 level, etc.
Fiberglass screen or whatever kind of screen you have lying around.  .
A plant hanging kit -chain and S hooks
(found at Lowe's in the garden section)
Scissors, Staple gun, Pliers (2 pairs needed)
                            

Step 1: First off if you picked up your frames at a thrift store or flea market then more than likely they are dusty and possibly splintered. Clean then off with a damp rag and sand them smooth if necessary. Flip them over and remove the staples from the back with your pliers.
Step 2: Then lay out your screen and place your frame on top. Cut out the shape of your frame.

Step 3:  Flip your frame back-side up and staple your screen on. Starting in the middle and working your way out so that you have a nice taut screen. You could also use small nails/tacks if you do not have a staple gun.

Step 4: Flip your frame front-side up and screw your screw hooks into the corners. Take advantage of the separation of the corners here for starting off your screw hooks. You could also use a drill to make the starter hole.
Screw hooks in all 4 corners...

Step 5: Take your chain and shorten it if necessary...test it out to make sure that you are happy with the length. If you are using the same packet of chain from Lowe's (2 chains, 4 S hooks) then you will want to split the 2 chains in 1/2 for a good length...about a foot or foot and 1/2.
**Open the links like you would a jump ring...side to side, with 2 pair of pliers.
Step 6: Now take your 4 chains and hook one end of each chain to each of the screw hooks on the 4 corners.
Step 7: Then take one of your S hooks and connect the other end of all 4 chains in the middle.
Step 8: Give the S hook a good squeeze so that you can keep all chains hooked up.
Step 9: Hang and add your herbs!


No flipping necessary...just spread your herbs out and walk away. The air will circulate through the screens and allow for quick drying time. Just make sure to hang your dryer somewhere dark and cool.
***Go a few steps further and add on a couple of levels. All you need to do is add your screw hooks to both the front and back-sides of the frame, in all 4 corners. Add your chain to connect the levels with an S hook or just by opening the chain links. If using the S hooks, make sure to squeeze them closed so that your levels do not come apart when you are moving or rehanging.

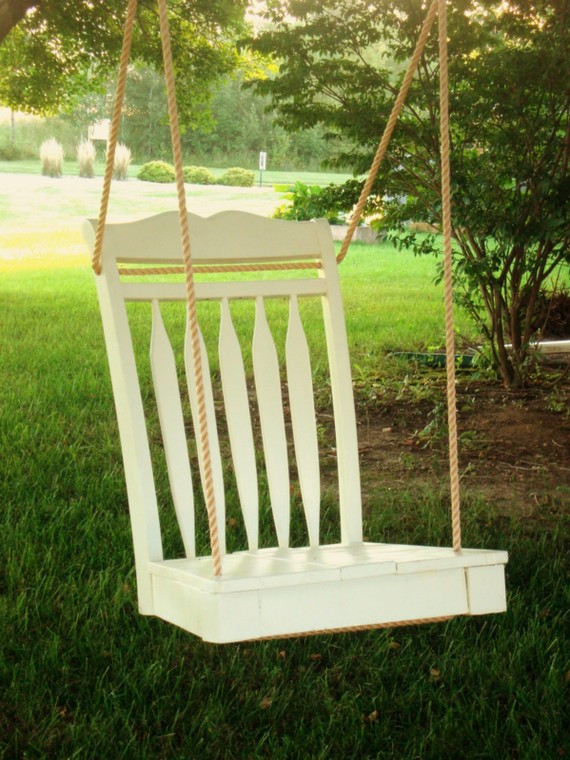
Dining Room Chair Tree Swing

Instructions:

Use a dining room chair that's structurally sound.

Remake it into a tree swing and you couldn't be more delighted with how it will turn out
A poly rope attached to the swing with an excess of 21' to tie it up to the tree.
All you need to do is tie it up to a sturdy limb and take a seat


Relax and enjoy this time of year when the days feel the warmth of summer's end and the nights feel the inklings of autumn. It would be so fun to hang this swing indoors during the winter months and cozy up in a soft blanket and good book.


Valentine's Day Crafts for Kids

Valentine's Day Sign Card

Create card by making signs out of construction paper, doilies and adhesive letters from an office-supply store.

Photograph your child holding the signs, then tape the pictures to construction paper and fold the card accordion-style.

The Simple Kitchen "Miracle" Cleaner


So...the other day I was finishing up the dishes of the day and hand-scrubbing the jelly roll pans (cookie sheets), because they don't fit in the dishwasher, and was quite appalled when I realized just how stained and nasty-looking they were!


In my defense...I have had these pans a LOOOONNNNGGGG time! They have seen a LOT of kitchen "action" since then.


It wasn't until a couple of years ago, I started using foil on my cookies sheets EVERYTIME I used them. Saves me SOOOO much clean up time...and grief. These pans have seen a LOT of abuse over the years.


As I stared at the pans I wondered how my "miracle" cleaner would work on these. A couple of weeks ago I shared how the "miracle" of baking soda and peroxide had pretty much changed my life!

My "miracle" cleaner couldn't possibly work on them....or could it?? hmmmmm. You know I had to find out.

Well, like they say....a picture's worth a thousand words!
TADA!

I cleaned HALF of this pan and left the other 1/2 untouched to show the stark difference! And honestly, it really didn't even take a whole lot of scrubbing to get it to look like this! My husband thinks I am insane....I was practically GIDDY cleaning my disgusting pans! :-) I DO have to tell you though...the stuff in the corners and on the sides of the pan were MUCH harder (almost impossible) to get completely clean. I managed to get a LOT of the build-up off...but those areas were much more of a challenge. I doubt I'll get them completely clean...but it's such a vast improvement...I really don't even care. :-)

Anyway, I just couldn't resist sharing another cleaning success story using my "miracle" cleaner. Hopefully some of you out there get as excited about this stuff as I do. If you haven't tried it yet....do it!
You'll be amazed!!!

Homemade Laundry Detergent


The Complete {Photo} Guide to Making Your Own Homemade Laundry Detergent
Step-by-step-by-step-by-step-by-step....


There have been a lot of questions posted lately about the whole laundry detergent-making process. Which I take as a great sign that more and more people are getting fed up with the ridiculously high-priced brand name stuff and turning to time-tested, "mother-approved" formulations that date back to before most of us were born! :-) And work JUST AS WELL, if not better than the over-priced, over-packaged stuff we are forced to lug home from the store in huge plastic bottles that chances are won't be recycled. *deep breath* (Stepping down off soapbox....for now).


In any case, I thought it might be helpful to post another "update", if you will, on the Homemade Laundry Detergent project with more pictures!

Keep in mind, however, there is no "right" way to make this stuff....this is just the way it works best for me. I would suggest if you want lots more VALUABLE INPUT from other readers....visit one of the following ORIGINAL POSTS and read the comments. GREAT information there!!


My Homemade Laundry Products Line-Up


Let's start with the basic recipe again:


Many people make this in a big, 5-gallon container, but call me lazy, cuz I don't like to drag in a 5 gallon bucket from the garage. When it's time to make soap, I just pull out my 4-quart saucepan like I'm cooking up a double batch of rice. :-)


First I add the grated bar of soap and add water to about the halfway mark.


I "cook" the soap soup at on medium low until all the little bits of soap are completely melted. To make sure of this...I will let it come to a boil for just a minute. That way I'm pretty sure no pieces of soap will be floating in my finished product.


I then add the 1 cup of Borax and the 1 cup of Washing Soda. Once again, we are only "cooking" it long enough to make sure it is all a combined and smooth texture. I try not to let it actually come to a boil because it will "boil over" very easily! (Not that I would know about that.)


When it's all nice and combined and sorta creamy looking (if kind of reminds me of cooking pudding at this point)...it's time to pour it into your soap containers.


I use (3) 1 gallon Minute Maid Orange Juice bottles.


I use a glass measuring cup and scoop the mixture out of the pan and pour into the bottles.


I THINK it ends up being about 4-5 cups in each bottle but I haven't actually measured it. I just keep adding a little to each until they are all at the same level (and the pan is empty.)


Now I take each one to the sink and hot water until each bottle is about 1/2 full.


This allows for room to shake the contents after it hardens AND to add more water to aid in that process.

Then I give each bottle a good shake! Come on...get your aggressions out! Feel the burn! ;-)


This is what it looks like when I'm done...and this is the way it will sit overnight.


Then in the morning.....it will look like this.


Pretty much one big blob of goop. lol.
DON'T BE ALARMED! DO NOT PANIC! This is perfectly normal!
Everything is going to be OK! I promise.


What *I* do at this point is take a long handled wooden spoon and break up the goo a little bit
then add more hot water...


....to just a few inches from the top


...and give it another vigorous shake!! Repeat with other 2 bottles.


They should look SOMETHING like this. But remember...this is not exact science...if they are a little thicker or runnier...don't worry. It will still be a great laundry detergent and as you continue making and using it...you'll figure out just what works for you.


TADA!! You just made your own homemade laundry detergent for PENNIES a load!!!!! Sure it might be a little lumpy...but who really cares?? It works! Pure and simple.


Honestly, I love this stuff. I don't miss the store-bought stuff one bit! Especially since I started using just a tiny bit of fragrance booster in each load. I kind of missed the scent of the old stuff...but I've found most people prefer this unscented version, especially those with sensitivities to that sort of thing.


There you have it. I really don't think I could have taken any MORE pictures of the whole process. I tried to cover every single step. Hopefully this is helpful for those of you who are trying this for the very first time. You "old-timers" shouldn't even be reading this...what are you doing here anyway? Just teasin'. :-) I can't tell you how grateful I am for the "old-timer" comments when people have questions because I can't always keep up AND your answers are usually better anyway!

The Perfect ANYTIME Snack Blend

I enjoy making this yummy snack during Autumn. Makes a pretty table/counter display of Fall colors. The perfect treat blend for my little gr...